If you have ever wanted to measure CO2 levels in your environment for air quality monitoring, safety, or automation projects, a Raspberry Pi CO2 monitoring system is one of the most cost-effective and customizable ways to do it.
With just a Raspberry Pi, a compatible CO2 sensor, and a few basic components, you can create DIY CO2 sensor projects for applications like indoor air quality testing, greenhouse control, industrial safety monitoring, and IoT smart home setups.
In this guide, you’ll learn exactly how to connect a K30 CO2 sensor to a Raspberry Pi, run Python code to capture real-time CO2 data, and explore project ideas that go beyond the basics.
What is a Raspberry Pi?
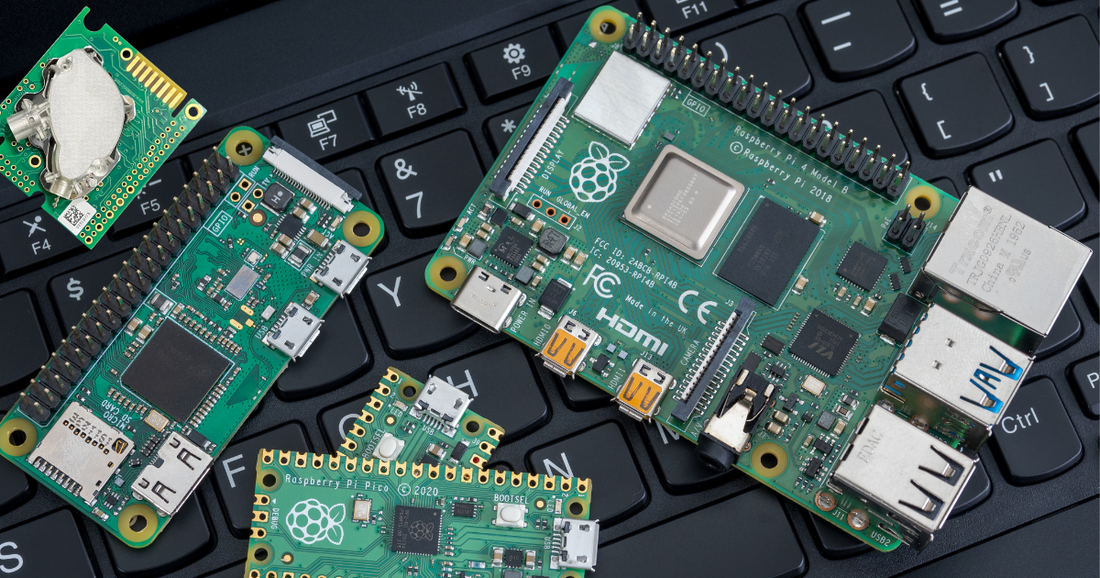
A Raspberry Pi is recognized as a series of small single-board computers developed in the United Kingdom by the Raspberry Pi Foundation in association with Broadcom. The Raspberry Pi project originally leaned towards the promotion of teaching basic computer science in schools and in developing countries.

For many individuals, including CO2Meter customers, as the Raspberry Pi's grew more popular, a wide range of individuals paired these computers with CO2 sensors to create a variety of experiments. Research and projects varied including robotics, agriculture, weather monitoring, indoor air quality monitoring, industrial and commercial automation, and much more.
Currently, because of its low cost, modularity, and open design, the Raspberry Pi still is recognized as the best-selling British computer.
Why use Raspberry Pi with CO2 Sensors?
Pairing a Raspberry Pi with a CO2 sensor like the K30 allows you to build a custom CO2 monitoring system without investing in expensive, pre-built equipment. You can program it to log readings, trigger alarms, or even automate ventilation systems when CO2 levels rise above a set threshold.
This setup is popular for:
- Indoor air quality monitoring
- Greenhouse CO2 control
- Industrial safety alarms
- Classroom STEM projects
- IoT home automation
By using Python scripts and open-source tools, you can expand your Raspberry Pi CO2 monitoring project to collect, visualize, and act on real-time sensor data.
How does a Raspberry Pi work?
The Raspberry Pi is a credit-card sized computer, which typically includes USB ports, plus Wi-Fi and Bluetooth connectivity. In addition, the module also includes a HDMI output that requires an HDMI cable with appropriate HDMI-capable monitor. Dependent upon preference, a USB keyboard and USB mouse are also always a necessity prior to operation.
To provide some perspective on operation of a Raspberry Pi, we will be using one of the Raspberry Pi models - the RPi3 model B and a K30 CO2 Sensor.
Example code for both the K30 sensor is included below.
The RPi3 offers a UART TXD-RXD connection for serial communication.

In addition, the Raspian Linux operating system used is installed using the NOOBS installer.
Connecting a K30 CO2 Sensor to a Raspberry Pi
1. Gather Your Components
- Raspberry Pi 3 or newer
- K30 CO2 sensor module
- HDMI monitor, USB keyboard, USB mouse
- 5VDC power supply for Raspberry Pi
- External 6–9VDC power supply (300mA minimum) for K30 sensor
- Jumper wires and breadboard (optional for cleaner wiring)
2. Wire the Sensor to Raspberry Pi
The K30 uses UART serial communication. Connect the TXD and RXD pins on the Raspberry Pi to the K30’s corresponding pins, ensuring proper voltage levels. Power the K30 from the external supply to avoid voltage drops during CO2 measurements.
3. Run the Blink Example:
We recommend you run the Blink example to verify your hardware and software is operating properly before you connect the K30 CO2 Sensor to your Raspberry Pi.
- Before you connect the CO2 sensor. Included in the downloaded folder is the blink.py python code.
- You can open it with the Geany, the Raspian code editor.
- Connect a LED and resistor to the RPi pin header to GPIO pins 9 and 12. The longer lead on the LED is positive, and connects through a 270 ohm, ¼ watt resistor to pin.
- The other LED lead connects to pin 9 which is GND (ground).
- Select Menu > Programming > Geany.
- Select File > Open > pi > AN137 > Blink.
- You should see the screen below.
- Select Build > Compile.
- Select Build > Execute.
- The LED will blink 12 times if everything is set up correctly. Otherwise, go back and retrace your steps before continuing!
Connecting a K30 CO2 Sensor to Raspberry Pi:

- Power the sensor with an external 6‐9VDC (recommended) power supply capable of 300mA output
- When the K‐30 sensor takes a measurement, the internal circuitry will draw a comparatively larger peak current for approximately 100 milliseconds
- Note: If power drops below 5.5VDC, the sensor will not work as described
Creating your RPi3-K30 Project:
- Select Menu > Programming > Geany
- Select File > Open > pi > AN127 > K30
- Observe the following screen:
 *Note: On line 6, the UART connection is ttyS0. Your tty connection may be different*
- Select Build > compile
- Select Build > execute
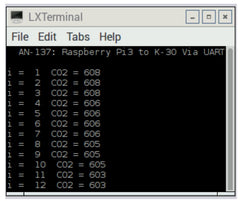
- The output is shown below:

K-30 CO2 Sensor Python Code

Real World CO2 Projects with Raspberry Pi
The possibilities for Raspberry Pi CO2 monitoring are virtually endless. Here are some real-world examples from CO2Meter customers:
-
Classroom STEM labs building low-cost air quality meters
-
Greenhouses automating CO2 injection for plant growth
-
COVID-19 ventilation monitoring in offices and classrooms
-
Weather and pollution stations for citizen science projects
-
IoT smart home systems integrating CO2 data with HVAC controls
Whether you’re tracking environmental data, building safety systems, or experimenting with automation, pairing a Raspberry Pi with a CO2 sensor opens up a world of creative possibilities.
FAQ: Raspberry Pi CO2 Monitoring
Q: Can a Raspberry Pi measure CO2 directly?
No, the Raspberry Pi needs an external CO2 sensor like the K30 to measure gas levels.
Q: What is the best CO2 sensor for Raspberry Pi?
For accuracy and integration, the K30 sensor is a proven choice.
Q: Do I need special software to run a CO2 sensor on Raspberry Pi?
No, you can use Python with built-in serial communication libraries.
Q: Can I log and graph CO2 data over time?
Yes — you can integrate your Python script with databases or visualization tools like Grafana.
For more information on CO2 sensing technologies or to speak to a CO2Meter expert, contact us at Sales@CO2Meter.com or 877-678-4259
Resources:
- Build a simple CO2 meter using Raspberry Pi 3! « Adafruit Industries – Makers, hackers, artists, designers and engineers!
- Setting up the MH-Z14A CO2 sensor with Raspberry Pi · cookies and containers (charlottemach.com)
- Building a CO₂ Monitor with Python on a Raspberry Pi | Nathan Goldbaum
- How To Connect a CO2 Sensor to a Raspberry Pi 4.0 | Atlas Scientific (atlas-scientific.com)
- Monitor CO2 with your Raspberry Pi · Simplepush


